
My kitchen often transforms into a little wonderland, especially when my kids are involved. One afternoon, my youngest, Leo, bounded in, asking for a “surprise cookie.” That spark ignited an idea, a vision of treats that held a secret joy, much like the piñatas we smash at parties. That’s how we first embarked on our adventure of learning how to make piñata cookies with candy inside.
The sheer delight on their faces when they bit into a seemingly ordinary cookie only to discover a cascade of sprinkles and mini chocolates was priceless. It reminded me that food is so much more than sustenance; it is love, connection, and pure, unadulterated fun. This recipe isn’t just about baking; it’s about creating those magical moments, those little bursts of joy that make family life so wonderfully sweet.
We perfected our method, ensuring the cookies were not only delicious but also held their sugary secret perfectly. If you are looking for a show-stopping dessert that doubles as an activity, then you absolutely must discover how to make piñata cookies with candy inside. This is a project that truly creates lasting memories.
Why You’ll Love This Recipe for Piñata Cookies with Candy Inside
You will adore this recipe for so many wonderful reasons! First, it is an absolute blast to create. Kids love helping with every step, from mixing the dough to choosing the tiny candies.
Second, these delightful cookies are an incredible surprise. Imagine the look of pure wonder on someone’s face when they bite into a cookie and a cascade of colorful sweets tumbles out! This recipe transforms a simple cookie into an interactive experience.
Furthermore, learning how to make piñata cookies with candy inside makes for incredibly versatile treats. You can customize them for any holiday, party theme, or simply for a fun afternoon snack. They look intricate but truly simplify the process, giving you impressive results with minimal stress.
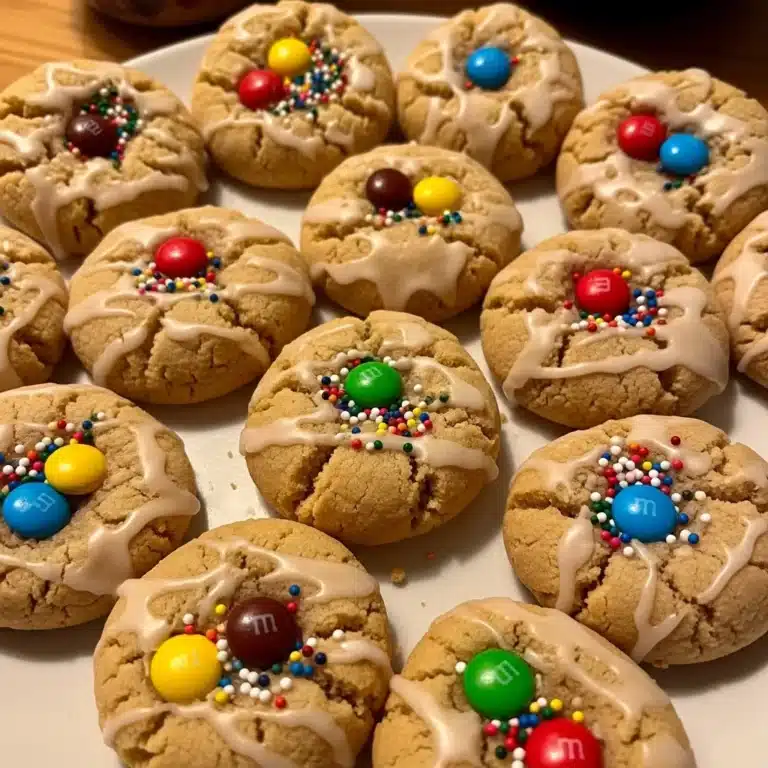
Finally, these cookies are delicious! A perfectly tender, buttery sugar cookie shell encases a sweet treasure. Every bite brings joy, making these piñata cookies with candy inside a true family favorite.
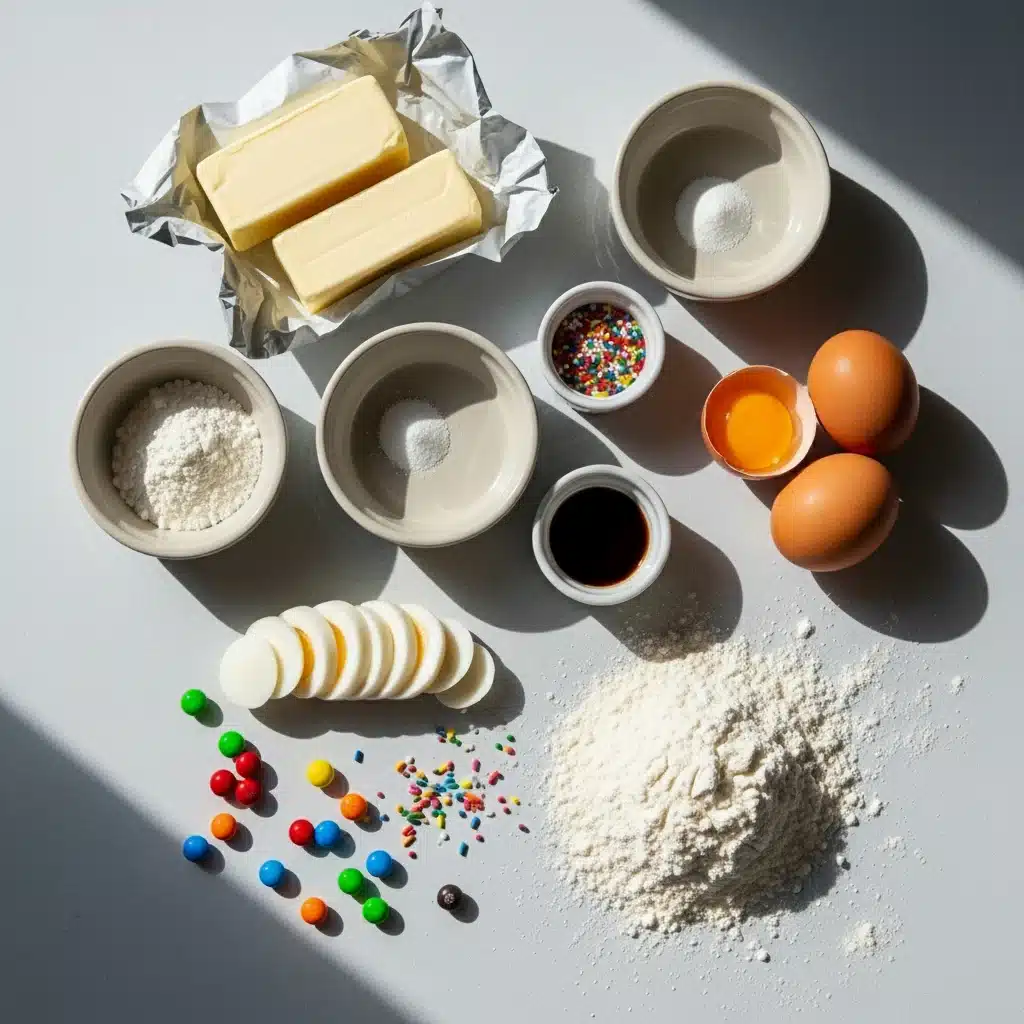
Ingredients You’ll Need
Gathering your ingredients is the first exciting step on your journey to discover how to make piñata cookies with candy inside. We use basic pantry staples for the sugar cookie dough, ensuring a classic, reliable flavor that everyone loves. Then, for the “piñata” part, you will select your favorite small candies!
| Ingredient | Quantity |
|---|---|
| All-purpose flour | 3 cups |
| Baking powder | 1 teaspoon |
| Salt | 1/2 teaspoon |
| Unsalted butter, softened | 1 cup (2 sticks) |
| Granulated sugar | 1 1/2 cups |
| Large eggs | 2 |
| Vanilla extract | 1 teaspoon |
| Small candies (e.g., mini M&M’s, sprinkles, Tic Tacs, small jelly beans) | 1/2 to 1 cup |
| Powdered sugar (for glaze/decorating, optional) | 1 cup |
| Milk (for glaze, optional) | 1-2 tablespoons |
| Food coloring (optional) | A few drops |
Substitutions & Variations
One of the best parts about making piñata cookies is their incredible adaptability. You can easily modify this recipe to suit different tastes, dietary needs, or holiday themes. Getting creative with how to make piñata cookies with candy inside truly makes them your own special treat.
For the Cookie Dough:
* Gluten-Free: Swap the all-purpose flour for a 1:1 gluten-free baking flour blend. Make sure your blend contains xanthan gum.
* Dairy-Free: Use a good quality plant-based butter substitute and a dairy-free milk alternative (like almond or soy milk) if making a glaze.
* Flavor Boost: Add a touch of almond extract instead of or in addition to vanilla for a different flavor profile. Lemon zest or orange zest in the dough brightens the taste beautifully. You can also mix in a teaspoon of cocoa powder for chocolate piñata cookies!
* Spice It Up: Include 1/2 teaspoon of cinnamon or a dash of nutmeg for a warmer, cozier flavor, perfect for fall or winter celebrations.
For the Candy Filling:
* Allergy-Friendly: If you need nut-free cookies, select candies explicitly labeled as nut-free. Avoid M&M’s unless they are the certified nut-free variety. Sprinkles, Smarties, and certain jelly beans often work well.
* Theme Specific:
* Christmas: Use red and green sprinkles, mini peppermints, or crushed candy canes.
* Halloween: Fill with candy corn, small gummy worms, or mini chocolate eyeballs.
* Valentine’s Day: Tiny conversation hearts or pink and red sprinkles create a romantic surprise.
* Birthday: Rainbow sprinkles and mini nonpareils are always a hit.
* Healthier Options: While these are definitely a treat, you could use small dried fruit pieces, like mini raisins or chopped dried cranberries, for a slightly less sugary filling.
* Small Toy Surprise: For a non-edible surprise (ensure safety and supervise children), you can include tiny trinkets like mini erasers or small plastic animals, making them ideal party favors. This is not for consumption, of course, but it enhances the surprise element.
For Decorating:
* Royal Icing: For a smoother, more durable finish, use royal icing instead of a simple powdered sugar glaze. It provides a beautiful, professional look.
* Fondant Details: Cut small shapes from rolled fondant to add intricate designs to the top of your cookies.
* Edible Glitter: A dusting of edible glitter makes your piñata cookies sparkle and shine, adding an extra touch of magic.
* Chocolate Drizzle: Melted chocolate, white or dark, drizzled over the top offers a sophisticated touch and added flavor.
These variations ensure that no matter the occasion or preference, you can confidently learn how to make piñata cookies with candy inside that perfectly fit the moment.
One of the best parts about making piñata cookies is their incredible adaptability. You can easily modify this recipe to suit different tastes, dietary needs, or holiday themes. To explore more customization options, check out How to Freeze Peaches.
Step-by-Step Instructions
Making these magical cookies is a delightful process, and I am here to guide you through every step. Follow these instructions carefully, and you will soon master how to make piñata cookies with candy inside.
1. Prepare the Dry Ingredients: In a medium bowl, whisk together the flour, baking powder, and salt. Set aside.
This ensures even distribution of the leavening agents.
2. Cream Butter and Sugar: In a large bowl, using an electric mixer, cream together the softened butter and granulated sugar on medium speed until light and fluffy, about 2-3 minutes.
Scrape down the sides of the bowl as needed.
3. Add Eggs and Vanilla: Beat in the eggs one at a time, mixing well after each addition.
Stir in the vanilla extract. The mixture will look creamy and smooth.
4.
Combine Wet and Dry: Gradually add the dry ingredient mixture to the wet ingredients, mixing on low speed until just combined. Do not overmix; overmixing develops gluten, resulting in tougher cookies.
5.
Chill the Dough: Divide the dough into two equal portions, flatten each into a disc, wrap them tightly in plastic wrap, and refrigerate for at least 1 hour. Chilling makes the dough easier to roll and prevents spreading. This is a crucial step for the structure of your piñata cookies.
6. Preheat Oven and Prepare Pans: Preheat your oven to 350°F (175°C). Line two baking sheets with parchment paper or silicone mats.
7. Roll and Cut Dough: On a lightly floured surface, roll out one disc of chilled dough to about 1/4 inch thickness. Use a large round (or desired shape) cookie cutter to cut out an even number of cookies.
For half of these cutouts, use a smaller round cutter to create a “window” in the center. These will be your top cookies. The ones without holes will be your bottom cookies.
8. Bake the Cookies: Carefully transfer the cookie cutouts to the prepared baking sheets. Bake for 8-10 minutes, or until the edges are lightly golden.
The baking time might vary slightly depending on your oven and cookie thickness.
9. Cool Completely: Remove cookies from the oven and let them cool on the baking sheets for a few minutes before transferring them to a wire rack to cool completely.
They must be entirely cool before assembly for the best results when learning how to make piñata cookies with candy inside.
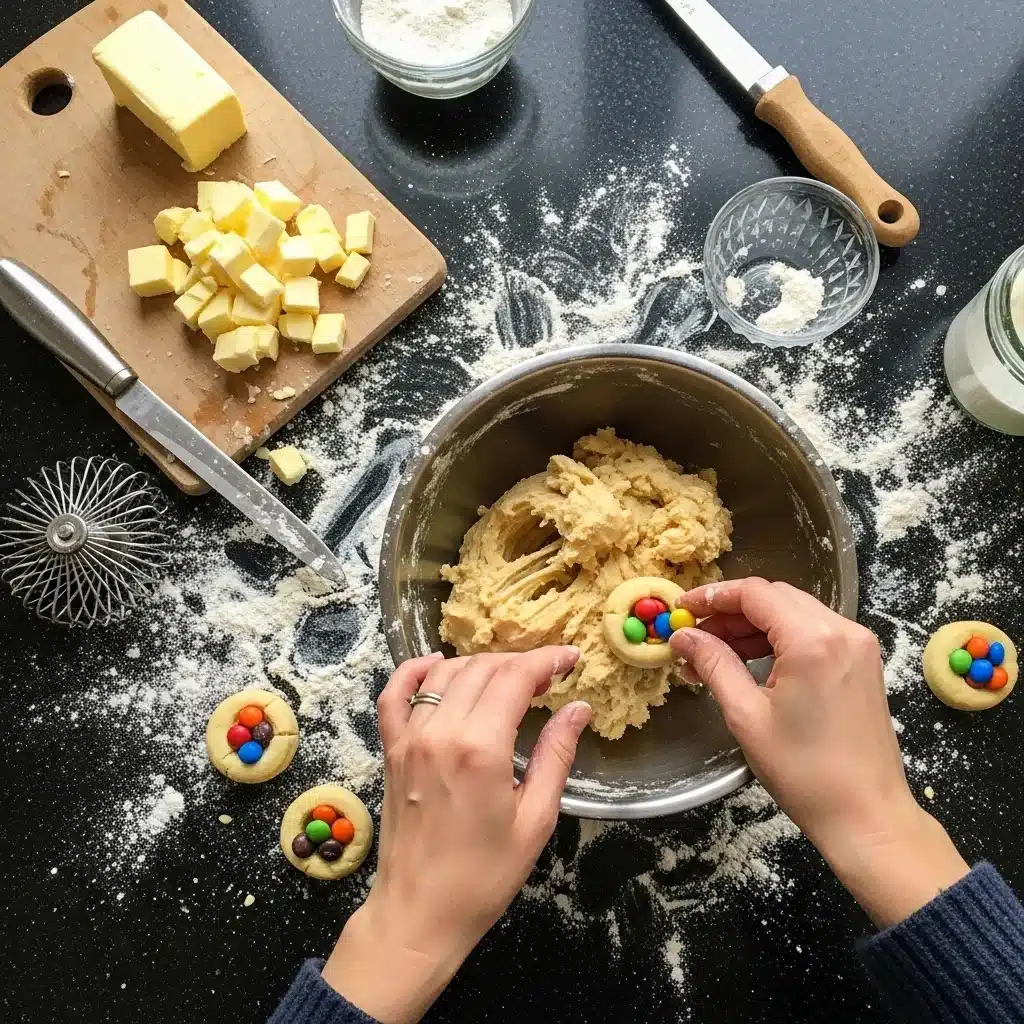
10. Assemble the Piñata Cookies:
* Take a bottom cookie (no hole).
Spread a thin layer of glaze or royal icing around the edge.
* Place a cookie with a hole on top of the bottom cookie, pressing gently to secure. You now have a small well in the center.
* Fill the well with your chosen small candies. Do not overfill! You need space for the top cookie.
* Spread a thin layer of glaze or royal icing around the edge of the cookie with the hole (the one you just placed).
* Carefully place a second cookie with a hole on top, creating a candy chamber. You’re building a little cookie sandwich with candy inside!
* If you want a fully sealed cookie, you can use a solid top cookie as well, but the double-holed top provides more space for candy. For maximum candy, stack two cookies with holes on top of the base, fill, and then cap with a final holed or solid cookie. This gives you extra volume for your piñata cookies with candy inside.
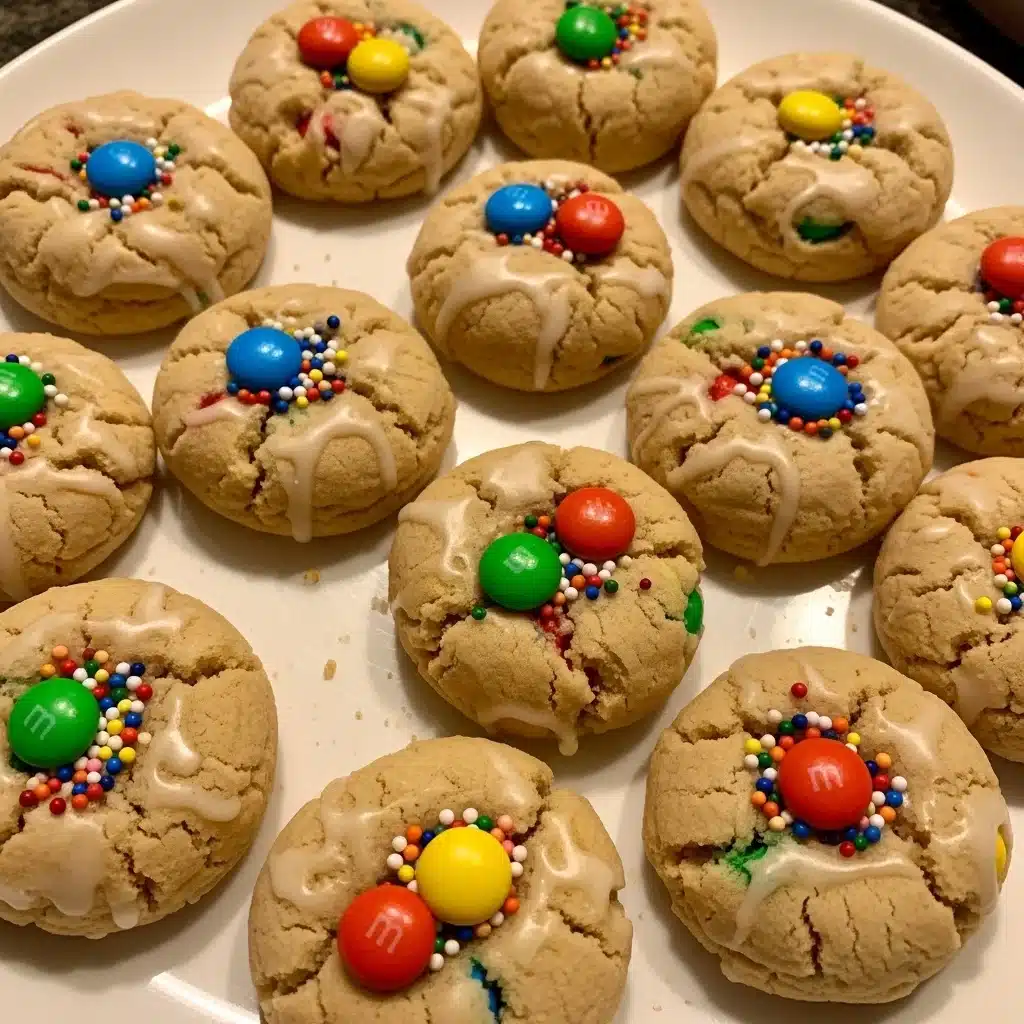
11. Decorate (Optional): Once assembled, you can decorate the tops of your piñata cookies with more glaze, sprinkles, or edible markers. Allow any glaze or icing to set completely before storing.
You have now mastered how to make piñata cookies with candy inside! Prepare for smiles and sweet surprises.
Pro Tips for Success
Creating perfect piñata cookies involves a few clever tricks that guarantee success and make the process smoother. These insights will help you confidently learn how to make piñata cookies with candy inside like a seasoned baker.
* Don’t Skip the Chill Time: Chilling the dough is paramount. It prevents the cookies from spreading too much in the oven, ensuring your shapes stay defined and your “candy chamber” maintains its integrity. A minimum of 1 hour is essential, but 2 hours or even overnight is even better.
* Consistent Dough Thickness: When rolling out your dough, aim for an even 1/4 inch thickness. This ensures all your cookies bake uniformly and stack evenly, creating a stable structure for your piñata cookies.
* Choose the Right Candy: Opt for small, hard candies that won’t melt easily in the warm cookie environment or become sticky.
Mini M&M’s, sprinkles, Tic Tacs, small jelly beans, and even certain small, hard fruit candies work beautifully. Avoid anything sticky like caramel bits or large gummy candies, as they can cause issues.
* Use the Right Cutter Sizes: Your inner cutter should be significantly smaller than your outer cutter to leave a sturdy rim on your “window” cookies.
This rim provides the structural support needed to hold the candy.
* Do Not Overbake: Slightly underbaked cookies are better than overbaked ones for this recipe. Overbaked cookies become crumbly, making them difficult to assemble without breaking.
Aim for light golden edges.
* Cool Completely: Ensure all cookie layers are entirely cool before you begin assembling. Warm cookies will melt your icing/glaze and can cause the structure to collapse.
Patience here pays off!
* Seal Tightly: When assembling, use enough glaze or icing to create a good seal between the cookie layers. This prevents candy from escaping prematurely.
A piping bag with a small round tip offers the most control for this step.
* Don’t Overfill: Resist the urge to pack too much candy into the center. Leave a little space for the top cookie layer to sit securely without pushing out the filling.
* Parchment Paper is Your Friend: Always bake on parchment paper. It prevents sticking, makes cleanup a breeze, and helps maintain the cookie’s shape.
* Batch Baking: If you have many cookies, bake them in batches to prevent overcrowding the oven. Overcrowding can lead to uneven baking.
Following these pro tips ensures your experience learning how to make piñata cookies with candy inside is as successful and enjoyable as possible.
Creating perfect piñata cookies involves a few clever tricks that guarantee success and make the process smoother. These insights will help you confidently learn how to make piñata cookies with candy inside like a seasoned baker. For additional refreshing tips, consider exploring How to Make Detox Drink for Summer? A Refreshing Guide.
Storage & Reheating Tips
Proper storage ensures your beautiful piñata cookies stay fresh and surprising. Once you have learned how to make piñata cookies with candy inside, you will want to know how to keep them perfect.
* Room Temperature: Store fully assembled and decorated piñata cookies in an airtight container at room temperature for up to 3-5 days. Ensure any icing or glaze has completely set before stacking them gently between layers of parchment paper. This prevents sticking and smudging.
* Refrigerator: While not strictly necessary for freshness, if your kitchen is particularly warm or you used a cream cheese-based icing, you can store them in an airtight container in the refrigerator for up to a week. Let them come to room temperature for about 15-20 minutes before serving for the best texture.
* Freezing Dough: You can prepare the cookie dough ahead of time and freeze it.
Wrap discs tightly in plastic wrap, then place them in a freezer-safe bag for up to 3 months. Thaw overnight in the refrigerator before rolling and baking.
* Freezing Baked Cookies (Unfilled): You can freeze baked, undecorated, and unfilled cookie shells for up to 2 months.
Once completely cool, arrange them in a single layer on a baking sheet to freeze solid, then transfer to a freezer-safe bag or container, layered with parchment paper. Thaw at room temperature before assembling and filling.
* Reheating: Piñata cookies are best enjoyed at room temperature. Reheating is not recommended, as it can melt the candy inside and alter the cookie’s texture.
Remember these simple guidelines to keep your fun piñata cookies fresh and ready for their big reveal.
What to Serve With This Recipe
These delightful piñata cookies with candy inside are a complete treat on their own, but pairing them with a few complementary items can elevate the experience. When you share your knowledge of how to make piñata cookies with candy inside, consider these serving suggestions.
* Milk: A classic pairing! A tall glass of cold milk perfectly balances the sweetness of the cookies and their candy filling. It is comforting and nostalgic.
* Coffee or Tea: For the adults, a warm cup of coffee or a comforting herbal tea provides a lovely counterpoint. The slight bitterness of coffee or the aromatic notes of tea beautifully complement the sweet treat.
* Hot Chocolate: Especially if you made chocolate piñata cookies or served them during colder months, a rich mug of hot chocolate creates an indulgent and cozy pairing.
* Ice Cream: Turn your piñata cookies into an even grander dessert! Serve a cookie alongside a scoop of vanilla bean or a complementary flavor of ice cream. The cold creaminess pairs wonderfully with the surprising crunch of the cookie and candy.
* Fruit Platter: For a lighter contrast, a fresh fruit platter with berries, melon, and grapes offers a refreshing balance to the sweetness.
* As Party Favors: Individually wrap your piñata cookies and use them as unique and memorable party favors. They are a fantastic take-home treat that guests will adore.
* At a Dessert Bar: Include these eye-catching cookies on a dessert bar with other small treats like cupcakes, brownies, and mini tarts for a truly impressive spread.
These serving suggestions enhance the fun and flavor of your incredible piñata cookies, making every moment you share them extra special.
These delightful piñata cookies with candy inside are a complete treat on their own, but pairing them with a few complementary items can elevate the experience. When you share your knowledge of how to make piñata cookies with candy inside, consider these serving suggestions. A delicious accompaniment can be found in How to Make Dubai Chocolate Bar: A Step-by-Step Guide (2025).
FAQs
You likely have a few questions about making these fun, surprising treats. Here are answers to some common inquiries about how to make piñata cookies with candy inside.
How do I prevent the candy from melting inside the cookies?
The key is to use small, heat-stable candies like sprinkles, mini M&M’s (which have a candy shell), Tic Tacs, or small jelly beans. Avoid chocolates without candy shells, gummy candies, or anything prone to melting or becoming excessively sticky. Also, ensure your cookies are completely cool before filling and assembling. The candy only goes in after baking, so it doesn’t melt in the oven.
Can I make the cookie dough ahead of time?
Absolutely! You can prepare the cookie dough up to 3 days in advance. Wrap it tightly in plastic wrap and store it in the refrigerator.
This can be a huge time-saver. You can also freeze the dough for up to 3 months; just thaw it in the refrigerator overnight before rolling. Making the dough ahead simplifies the process of learning how to make piñata cookies with candy inside.
What kind of candies work best for piñata cookies?
The best candies are small, hard, and colorful. Think mini M&M’s, rainbow sprinkles, nonpareils, small jelly beans, Tic Tacs, or even crushed hard candies. You want candies that won’t clump together, melt, or stick to the cookie walls too much. The surprise element comes from the candies tumbling out!
How many piñata cookies does this recipe make?
This recipe typically yields about 18-24 assembled piñata cookies, depending on the size of your cookie cutters and how many layers you stack. This quantity provides plenty of delightful surprises for a party or family treat.
Are piñata cookies suitable for mailing?
Yes, they can be! For mailing, ensure the cookies are fully cooled and the icing is completely set. Wrap each cookie individually in plastic wrap, then pack them snugly in an airtight container with cushioning (like tissue paper or bubble wrap) to prevent shifting and breakage. Choose sturdy candies for the filling to withstand transit.
Can I use different cookie cutter shapes?
Certainly! While round cutters are classic and easy, you can use any sturdy cookie cutter shape for the outer cookie. Just ensure you have a smaller cutter that creates a sufficient “window” inside to hold the candy and leaves enough of a border for structural integrity. Shapes like squares, hearts, or stars also work beautifully when you are figuring out how to make piñata cookies with candy inside.
Making piñata cookies with candy inside is a delightful way to add surprise and joy to baking. These treats offer a fun twist on traditional cookies, allowing for creativity in both flavor and presentation; learn more about this fun baking activity here.
Nutrition Information (per serving)
Here is an estimated nutritional breakdown for one piñata cookie, based on the ingredients and an average serving size. Note that actual values may vary based on specific ingredients, portion sizes, and candy choices.
| Nutrient | Amount |
|---|---|
| Calories | 250 kcal |
| Total Fat | 12 g |
| Saturated Fat | 7 g |
| Cholesterol | 40 mg |
| Sodium | 110 mg |
| Total Carbohydrates | 35 g |
| Dietary Fiber | 0.5 g |
| Total Sugars | 20 g |
| Protein | 3 g |
how to make piñata cookies with candy inside
A delightful recipe for piñata cookies filled with surprise candies that create magical moments for families.
- Total Time: 30 mins
- Yield: 18-24 cookies 1x
Ingredients
3 cups All-purpose flour
1 teaspoon Baking powder
1/2 teaspoon Salt
1 cup Unsalted butter, softened
1 1/2 cups Granulated sugar
2 Large eggs
1 teaspoon Vanilla extract
1/2 to 1 cup Small candies (e.g., mini M&M’s, sprinkles, Tic Tacs, small jelly beans)
1 cup Powdered sugar (for glaze/decorating, optional)
1–2 tablespoons Milk (for glaze, optional)
A few drops Food coloring (optional)
Instructions
- Prepare the dry ingredients: Whisk together flour, baking powder, and salt in a medium bowl
- Cream butter and sugar: Beat softened butter and granulated sugar until light and fluffy
- Add eggs and vanilla: Mix in eggs one at a time and stir in vanilla extract until smooth
- Combine wet and dry: Gradually mix in the dry ingredients until just combined
- Chill the dough: Divide into two discs and refrigerate for at least 1 hour
- Preheat oven: Set your oven to 350°F (175°C) and prepare baking sheets
- Roll and cut dough: Roll out dough and cut out cookies, with some having a center cutout
- Bake the cookies: Bake for 8-10 minutes until edges are lightly golde
- Cool completely: Let cookies cool on a wire rack
- Assemble piñata cookies: Use glaze to layer and fill cookies with small candies
- Decorate: Optionally decorate with glaze, sprinkles, or other toppings
Notes
Use a variety of small, hard candies for the filling to avoid melting.
Ensure cookies are completely cool before assembling to maintain structure.
- Prep Time: 20 mins
- Cook Time: 10 mins
- Category: Dessert
- Method: Baking
- Cuisine: American
- Diet: Gluten Free option available
Nutrition
- Serving Size: 1 cookie
- Calories: 250 kcal
- Sugar: 20 g
- Sodium: 110 mg
- Fat: 12 g
- Saturated Fat: 7 g
- Unsaturated Fat: 3 g
- Trans Fat: 0 g
- Carbohydrates: 35 g
- Fiber: 0.5 g
- Protein: 3 g
- Cholesterol: 40 mg