
Oh, the memories a simple pie can conjure! I remember my grandmother, apron dusted with flour, humming softly as she rolled out pie crusts on her worn wooden board. Her kitchen always smelled of warmth, love, and a hint of something sweet baking.
Among her many specialties, one stood out for its comforting simplicity and incredible flavor: her buttermilk pie. It wasn’t fancy, but every bite felt like a hug. That taste of home is what I strive for in my own kitchen, especially now as a mom of three, constantly looking for simple, nourishing recipes that bring us all together.
I’ve tweaked her methods a bit over the years, aiming for even easier execution without losing any of that old-fashioned charm. Today, I’m so excited to share my go-to Buttermilk Pie Recipe from Scratch with you. It’s a truly delightful dessert, embodying everything I love about homemade treats – real ingredients, genuine flavor, and the joy of creating something wonderful with your own hands.
This Buttermilk Pie Recipe from Scratch is more than just a recipe; it’s a piece of culinary history, a comfort food classic, and a testament to the fact that the simplest ingredients often yield the most profound tastes. Get ready to fall in love with making a homemade buttermilk pie.
Why You’ll Love This Buttermilk Pie Recipe
You’ll quickly discover why this Buttermilk Pie Recipe from Scratch becomes an instant family favorite. First, its simplicity truly shines. We use everyday ingredients you likely already have in your pantry and fridge, making this an incredibly accessible dessert to whip up anytime.
No fancy equipment or exotic components are necessary for this beautiful homemade buttermilk pie. Second, the flavor profile is simply divine. It offers a unique balance of creamy tanginess from the buttermilk, coupled with a sweet, custardy filling that practically melts in your mouth.
The subtle hint of vanilla and nutmeg rounds out the taste, creating a comforting experience reminiscent of simpler times. This classic buttermilk pie recipe delivers big on flavor without being overly rich. Third, the sheer satisfaction of presenting a beautiful, golden-brown pie you made entirely from scratch is unbeatable.
There’s a special pride that comes from baking a Buttermilk Pie Recipe from Scratch, especially one that evokes such warm memories and tastes so incredibly good. It’s a budget-friendly dessert that feels utterly luxurious, perfect for family dinners or a casual get-together. This easy buttermilk pie recipe proves that sometimes, the simplest things are the best.
Ingredients You’ll Need
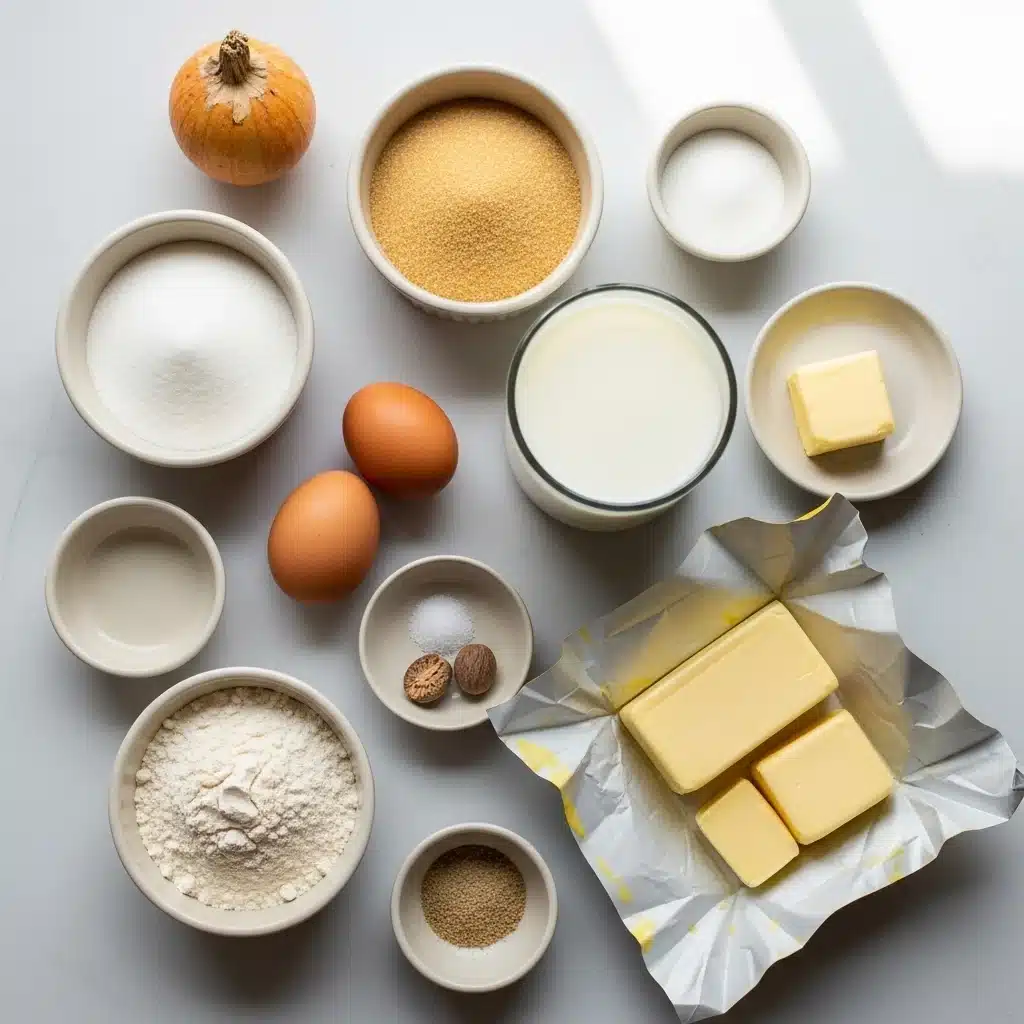
Gathering your ingredients is the first exciting step towards making this incredible Buttermilk Pie Recipe from Scratch. We’ll divide them into two main categories: the perfect homemade pie crust and the luscious buttermilk filling. Making a homemade buttermilk pie crust elevates this dessert to another level, but don’t fret; it’s easier than you think!
| For the Pie Crust (One 9-inch crust) | For the Buttermilk Filling |
|---|---|
| 1 ¼ cups all-purpose flour | 1 ½ cups granulated sugar |
| ½ teaspoon salt | 4 large eggs |
| ½ cup (1 stick) unsalted butter, very cold and cut into cubes | ¾ cup buttermilk |
| ¼ cup ice water, plus more if needed | ¼ cup (½ stick) unsalted butter, melted and cooled slightly |
| 2 tablespoons all-purpose flour | |
| 1 teaspoon vanilla extract | |
| ¼ teaspoon freshly grated nutmeg (optional, but recommended) | |
| Pinch of salt |
Substitutions & Variations
One of the beautiful things about a classic like this Buttermilk Pie Recipe from Scratch is its versatility. You can easily adapt it to suit different dietary needs or simply add your own unique twist. Never hesitate to experiment with your homemade buttermilk pie.
* Gluten-Free Crust: Easily substitute the all-purpose flour in the pie crust with a 1:1 gluten-free baking blend. Ensure your chosen blend contains xanthan gum for best results. This allows everyone to enjoy your from-scratch buttermilk pie.
* Dairy-Free Buttermilk Pie: For a dairy-free version, use a plant-based butter alternative for both the crust and the filling. For the buttermilk, combine ¾ cup of a non-dairy milk (like almond or soy milk) with 1 tablespoon of lemon juice or apple cider vinegar. Let it sit for 5-10 minutes until it slightly curdles.
This creates a wonderful dairy-free “buttermilk” for your homemade buttermilk pie.
* Flavor Boosts:
* Lemon Zest: Add 1-2 teaspoons of fresh lemon zest to the filling mixture for a brighter, more citrusy note. It perfectly complements the buttermilk’s tang.
* Bourbon or Rum: For an adult twist, stir in 1-2 tablespoons of bourbon or dark rum with the vanilla extract. This adds a lovely depth of flavor to your Buttermilk Pie Recipe from Scratch.
* Coconut: Mix in ½ cup of shredded coconut to the filling for a tropical touch.
* Spices: Play with other warm spices like a pinch of cinnamon or cardamom alongside the nutmeg for a different aromatic profile.
* Mini Pies or Tarts: Instead of one large pie, press the crust into mini pie pans or muffin tins for individual servings. Adjust baking time accordingly; they will bake faster.
This is a fun way to serve your homemade buttermilk pie.
* Store-Bought Crust: If time is truly of the essence, you can absolutely use a high-quality store-bought pie crust. Just ensure it’s a deep-dish variety. While I always encourage making the Buttermilk Pie Recipe from Scratch fully, shortcuts are sometimes necessary!
One of the beautiful things about a classic like this Buttermilk Pie Recipe from Scratch is its versatility. You can easily adapt it to suit different dietary needs or simply add your own unique twist. For an unforgettable experience, consider trying out our German Chocolate Cake Recipe – Rich, Nostalgic & Easy to Make as a delightful alternative.
Step-by-Step Instructions
Creating this delicious Buttermilk Pie Recipe from Scratch is a straightforward process. Just follow these steps, and you’ll have a gorgeous homemade buttermilk pie ready to impress!
Step 1: Prepare the Pie Crust (if making from scratch)
In a large bowl, whisk together the all-purpose flour and salt. Cut the very cold, cubed butter into the flour mixture using a pastry blender, two knives, or your fingertips. Work quickly until the mixture resembles coarse crumbs with some pea-sized pieces of butter remaining.
Gradually add the ice water, 1 tablespoon at a time, mixing until the dough just comes together. Do not overmix. Form the dough into a disc, wrap it in plastic, and refrigerate for at least 30 minutes.
Step 2: Roll Out the Crust & Prepare for Baking
On a lightly floured surface, roll out the chilled pie dough into a 12-inch circle. Carefully transfer the dough to a 9-inch pie plate. Trim the edges, leaving about a ½-inch overhang, then crimp or flute the edges as desired.
Refrigerate the pie shell for another 15-20 minutes. This step helps prevent shrinkage and results in a flakier homemade buttermilk pie crust.
Step 3: Preheat Oven & Blind Bake (Optional but Recommended)
Preheat your oven to 375°F (190°C). Line the chilled pie crust with parchment paper and fill with pie weights, dried beans, or rice. Blind bake for 15-20 minutes, or until the edges are lightly golden.
Remove the parchment paper and weights, then bake for another 5-7 minutes, until the bottom appears dry. This helps prevent a soggy bottom crust, essential for a perfect Buttermilk Pie Recipe from Scratch.
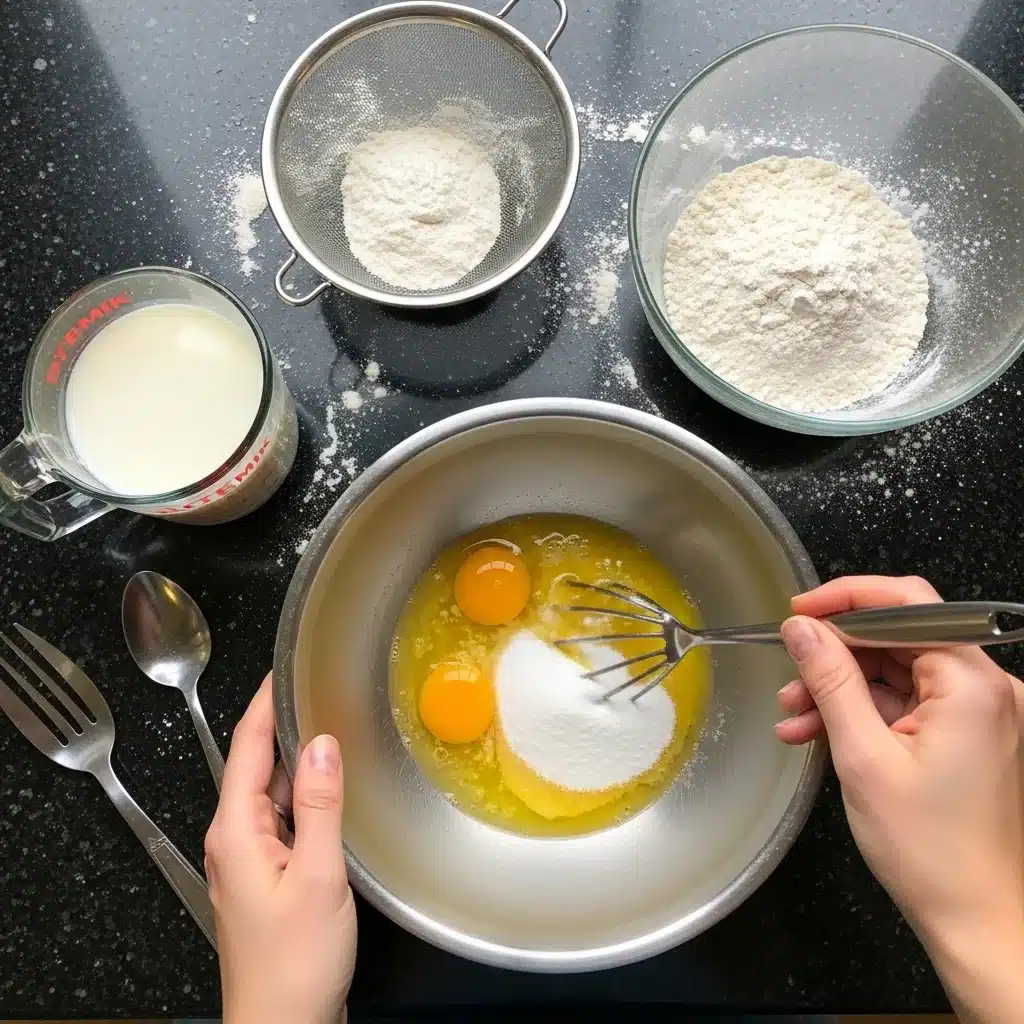
Step 4: Prepare the Buttermilk Filling
While the crust bakes (or cools, if using a pre-baked crust), prepare the filling. In a large bowl, whisk together the granulated sugar, eggs, buttermilk, melted butter, flour, vanilla extract, nutmeg (if using), and a pinch of salt. Whisk until the mixture is smooth and well combined. This is the heart of your homemade buttermilk pie.
Step 5: Assemble and Bake the Pie
Pour the prepared buttermilk filling into the warm, partially baked pie crust. Carefully transfer the pie plate back to the oven. Reduce the oven temperature to 350°F (175°C).
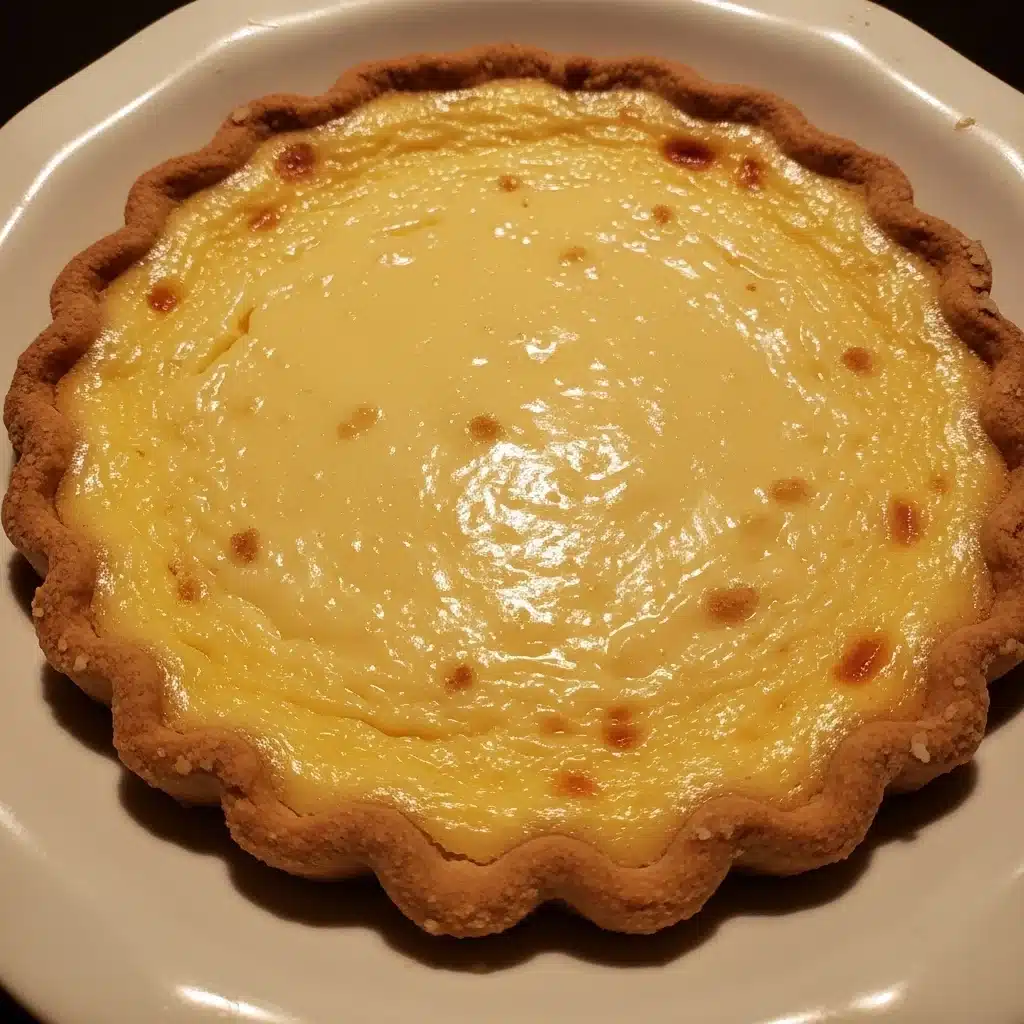
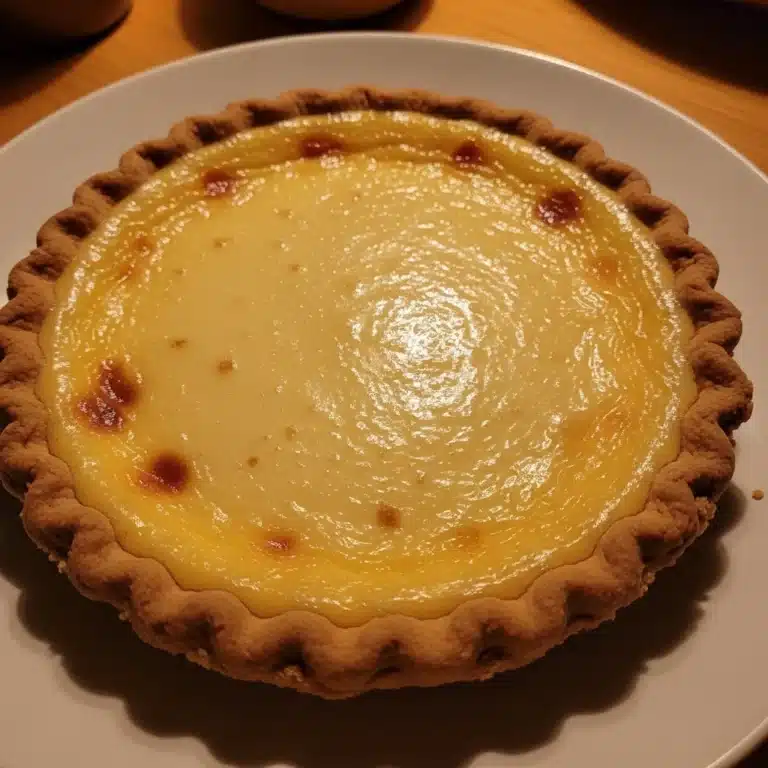
Bake for 45-60 minutes, or until the edges of the pie are set and lightly golden, but the center still has a slight jiggle. A knife inserted near the edge should come out clean. The slight jiggle in the center indicates a perfectly creamy texture for your Buttermilk Pie Recipe from Scratch.
Step 6: Cool Completely
Once baked, carefully remove the pie from the oven and place it on a wire rack. Allow the pie to cool completely at room temperature for at least 2-3 hours, or even longer. The filling will continue to set as it cools, achieving that ideal custardy texture.
Patience is key for this homemade buttermilk pie! Resist the urge to cut into it too soon.
Pro Tips for Success
Achieving a perfectly delicious Buttermilk Pie Recipe from Scratch involves a few simple tricks. Keep these pro tips in mind to ensure your homemade buttermilk pie turns out beautifully every single time.
* Cold Butter for Crust: Always use very cold butter for your pie crust. Cold butter creates steam as it bakes, which results in a flaky, tender crust. Warm butter melts too quickly, leading to a tough crust.
This is crucial for a fantastic homemade buttermilk pie.
* Don’t Overwork the Dough: Mix the pie crust dough just until it comes together. Overworking the dough develops too much gluten, which makes the crust tough.
Handle it minimally for a tender Buttermilk Pie Recipe from Scratch.
* Chill the Crust: Chilling the pie crust at various stages (after mixing, after rolling and placing in the pie plate) helps the butter firm up and prevents shrinkage during baking. It also contributes to a flakier texture for your classic buttermilk pie.
* Blind Baking is Your Friend: While optional, blind baking the pie crust creates a barrier against the wet filling, preventing a soggy bottom. For a truly professional homemade buttermilk pie, do not skip this step.
* Room Temperature Ingredients for Filling: For the filling, ensure your eggs and buttermilk are at room temperature.
They incorporate more smoothly and create a more uniform, creamy custard texture for your Buttermilk Pie Recipe from Scratch.
* Gentle Whisking: When mixing the filling, whisk gently until just combined. Over-whisking can incorporate too much air, leading to cracks in the pie as it cools.
* Watch for the Jiggle: The pie is done when the edges are set and a knife inserted about one inch from the edge comes out clean, but the very center still has a slight, delicate jiggle. It will continue to set as it cools. Overbaking can make the filling rubbery.
* Cool Completely: Allow the Buttermilk Pie Recipe from Scratch to cool completely on a wire rack. This is arguably the most important tip! The custard needs time to fully set and firm up.
Cutting into it too early will result in a messy, unset slice. Patience yields perfect slices of homemade buttermilk pie.
Achieving a perfectly delicious Buttermilk Pie Recipe from Scratch involves a few simple tricks. Keep these pro tips in mind to ensure your homemade buttermilk pie turns out beautifully every single time, and don’t forget to check out our Protein Brownies: Delicious High-Protein Treats That Satisfy for more baking inspiration.
Storage & Reheating Tips
Once you’ve successfully baked your amazing Buttermilk Pie Recipe from Scratch, you’ll want to ensure it stays fresh and delicious. Proper storage makes all the difference for your homemade buttermilk pie.
* Countertop Storage (Short-term): If you plan to serve the pie within a few hours and your kitchen is cool, you can leave it loosely covered on the countertop. However, due to the egg and dairy content, I generally recommend refrigeration for safety.
* Refrigeration (Best Method): For longer storage, cover the cooled Buttermilk Pie Recipe from Scratch loosely with plastic wrap or aluminum foil.
Store it in the refrigerator for up to 3-4 days. The pie actually tastes wonderful chilled, allowing the flavors to meld beautifully.
* Freezing: You can freeze a baked Buttermilk Pie Recipe from Scratch.
Once completely cooled, wrap the entire pie (or individual slices) tightly in plastic wrap, then again in aluminum foil. Freeze for up to 1-2 months. Thaw overnight in the refrigerator before serving.
* Reheating: This Buttermilk Pie Recipe from Scratch is typically served chilled or at room temperature. If you prefer a slightly warm slice, you can gently reheat individual servings in the microwave for 15-30 seconds, or in a preheated oven at 250°F (120°C) for about 10-15 minutes, until just warmed through. Be careful not to overheat, as it can dry out the custard.
What to Serve With This Recipe
This Buttermilk Pie Recipe from Scratch truly stands alone as a magnificent dessert. Its unique tangy-sweet flavor and creamy texture make it deeply satisfying on its own. However, a few simple additions can elevate the experience even further, turning your homemade buttermilk pie into an unforgettable treat.
* Fresh Berries: A handful of fresh, seasonal berries is the quintessential pairing. Strawberries, raspberries, blueberries, or a mix of all three add a burst of freshness, vibrant color, and a lovely tart counterpoint to the pie’s sweetness.
* Whipped Cream: A dollop of freshly whipped cream, lightly sweetened with a touch of vanilla, is always a welcome companion.
Its light, airy texture beautifully complements the dense, custardy filling of the classic buttermilk pie.
* Vanilla Bean Ice Cream: For a truly decadent treat, serve a warm slice of your Buttermilk Pie Recipe from Scratch with a scoop of premium vanilla bean ice cream. The contrasting temperatures and creamy richness are pure bliss.
* Fruit Coulis: A simple fruit coulis (a thin fruit puree, like raspberry or strawberry) drizzled over the plate adds an elegant touch and another layer of fruity flavor.
* A Hot Beverage: A strong cup of coffee, a warm cup of black tea, or even a glass of cold milk makes for a perfect beverage pairing with this comforting homemade buttermilk pie. The pie’s sweetness harmonizes wonderfully with the bitterness of coffee or tea.
* Candied Pecans: For added texture and a nutty flavor, sprinkle a few candied pecans on top of each slice. This adds a lovely crunch to your from-scratch buttermilk pie.
This Buttermilk Pie Recipe from Scratch truly stands alone as a magnificent dessert. Its unique tangy-sweet flavor and creamy texture make it deeply satisfying on its own, but if you’re interested in enhancing your dessert spread, you’ll love our Strawberry Cake and Cheesecake – Best Layers of Flavor for a stunning accompaniment.
FAQs
You might have a few questions about making this delightful Buttermilk Pie Recipe from Scratch. Here are some common inquiries and their answers to help you succeed with your homemade buttermilk pie.
Can I use a store-bought pie crust for this Buttermilk Pie Recipe from Scratch?
Absolutely! While I always encourage making the crust from scratch for the best flavor and texture, a good quality store-bought pie crust works perfectly. Just make sure it’s a 9-inch deep-dish crust, and follow the blind baking instructions to prevent a soggy bottom. This will still result in a wonderful homemade buttermilk pie.
What if I don’t have buttermilk on hand? Can I make my own?
Yes, you can easily make a homemade buttermilk substitute! For ¾ cup of buttermilk, simply pour ¾ cup of regular milk (dairy or non-dairy) into a liquid measuring cup and stir in 1 tablespoon of fresh lemon juice or white vinegar. Let it sit for 5-10 minutes until it slightly curdles. This creates an excellent substitute for your Buttermilk Pie Recipe from Scratch.
How do I know when my Buttermilk Pie Recipe from Scratch is perfectly baked?
Look for the edges to be set and lightly golden. If you gently jiggle the pie, the very center should still have a slight, soft wobble. A knife or toothpick inserted about an inch from the edge should come out clean. Overbaking can lead to a rubbery filling, so trust the jiggle!
Can I make this Buttermilk Pie Recipe from Scratch ahead of time?
Yes, this pie is an excellent make-ahead dessert! You can bake it a day or two in advance. Store the completely cooled pie, covered, in the refrigerator.
The flavors often deepen and meld beautifully overnight, making it taste even better the next day. This makes your homemade buttermilk pie perfect for entertaining.
Why did my pie crack on top?
Cracking usually occurs if the pie bakes too long or at too high a temperature, causing the custard to set too quickly and then contract as it cools. Over-whisking the filling, which incorporates too much air, can also contribute to cracks. Don’t worry, even a cracked pie tastes delicious! You can easily cover cracks with whipped cream or fresh berries.
Can I add other flavors to the Buttermilk Pie Recipe from Scratch?
Of course! This recipe is very adaptable. Consider adding lemon zest for a brighter taste, a touch of bourbon for depth, or even a sprinkle of shredded coconut in the filling. See the “Substitutions & Variations” section for more ideas to customize your homemade buttermilk pie.
Buttermilk pie is a traditional Southern dessert known for its creamy custard-like filling and a slight tang from the buttermilk. This beloved recipe often evokes a sense of nostalgia and comfort, representing the essence of homemade treats in American cuisine, as detailed in this culinary overview.
Nutrition Information (per serving)
Here’s an estimated nutritional breakdown for one slice of this Buttermilk Pie Recipe from Scratch, assuming eight servings per pie. Please remember that these are approximate values and can vary based on specific ingredients and portion sizes.
| Nutrient | Amount (Approx.) |
|---|---|
| Calories | 380 kcal |
| Total Fat | 18 g |
| Saturated Fat | 10 g |
| Cholesterol | 120 mg |
| Sodium | 250 mg |
| Total Carbohydrates | 50 g |
| Dietary Fiber | 1 g |
| Total Sugars | 35 g |
| Protein | 6 g |
Buttermilk Pie Recipe from Scratch
This Buttermilk Pie Recipe from Scratch is a comforting dessert that combines creamy tanginess from buttermilk with a sweet custardy filling. It's a classic dish that evokes warm memories and is a testament to the beauty of simple, homemade desserts.
- Total Time: 80 mins
- Yield: 8 servings 1x
Ingredients
1 ¼ cups All-purpose flour
½ teaspoon Salt
½ cup Unsalted butter, very cold and cut into cubes
¼ cup Ice water, plus more if needed
1 ½ cups Granulated sugar
4 Large eggs
¾ cup Buttermilk
¼ cup Unsalted butter, melted and cooled slightly
2 tablespoons All-purpose flour
1 teaspoon Vanilla extract
¼ teaspoon Freshly grated nutmeg (optional)
Pinch of salt
Instructions
- Step 1: In a large bowl, whisk together the all-purpose flour and salt. Cut the very cold, cubed butter into the flour mixture until it resembles coarse crumbs. Gradually add the ice water until the dough comes together. Form into a disc, wrap in plastic, and refrigerate for at least 30 minutes
- Step 2: Roll out the chilled pie dough and place it in a 9-inch pie plate. Trim edges, crimp, and refrigerate for another 15-20 minutes
- Step 3: Preheat oven to 375°F. Blind bake the crust with weights for 15-20 minutes until edges are golden. Remove weights and bake for another 5-7 minutes
- Step 4: In a large bowl, whisk together granulated sugar, eggs, buttermilk, melted butter, flour, vanilla extract, nutmeg, and a pinch of salt until smooth
- Step 5: Pour the filling into the warm pie crust. Reduce oven temperature to 350°F and bake for 45-60 minutes until edges are set but center jiggles slightly
- Step 6: Allow to cool completely on a wire rack for 2-3 hours before serving
Notes
Ensure butter is cold for a flaky crust.
Chill your crust at various stages for best texture.
Allow pie to cool completely to set before slicing.
- Prep Time: 20 mins
- Cook Time: 60 mins
- Category: Dessert
- Method: Baking
- Cuisine: American
- Diet: Gluten Free (with crust modification)
Nutrition
- Serving Size: 1 slice
- Calories: 380 kcal
- Sugar: 35 g
- Sodium: 250 mg
- Fat: 18 g
- Saturated Fat: 10 g
- Unsaturated Fat: 8 g
- Trans Fat: 0 g
- Carbohydrates: 50 g
- Fiber: 1 g
- Protein: 6 g
- Cholesterol: 120 mg