The rain drummed a steady rhythm against our kitchen window, and the kids, bless their energetic hearts, were bouncing off the walls. It was one of those afternoons where a simple snack just wouldn’t cut it. We needed magic.
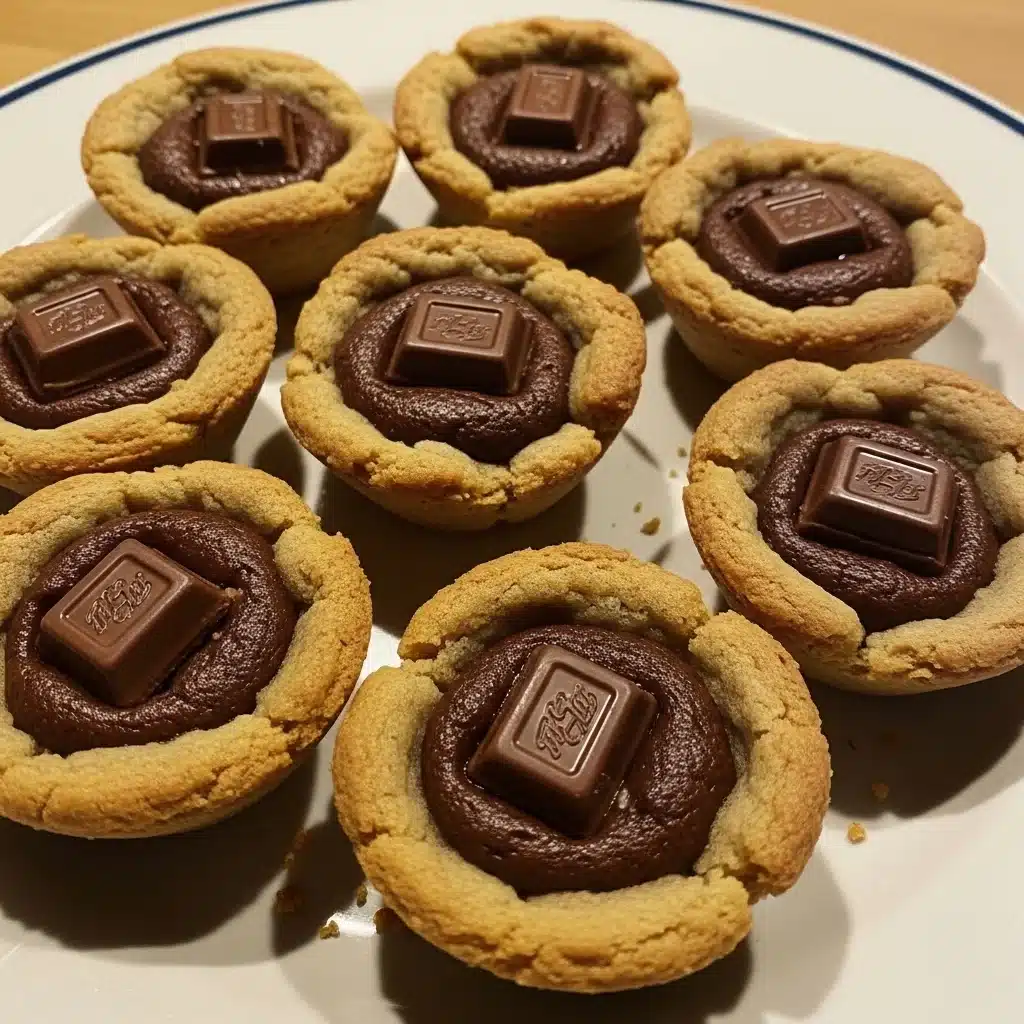
We needed warmth. We needed something that felt like a hug from the inside out. That’s when my youngest, Lily, tugged on my apron strings, her eyes wide with a plea for “something chocolatey, Mom, but like, *super* special.” My mind instantly conjured images of these incredible Stuffed Cookie Cups with Molten Center.
They’re a dessert that delivers on every promise: easy enough for a busy weeknight, impressive enough for a party, and absolutely brimming with a delightful, gooey surprise. I truly believe food is love, and watching their faces light up with the first bite of a warm, chocolate-oozing Stuffed Cookie Cups with Molten Center is pure joy.
This recipe isn’t just about baking; it’s about creating those precious memories, the kind that stick around long after the last crumb is gone. Get ready to bake a little bit of magic today!
Why You’ll Love These Stuffed Cookie Cups with Molten Center
You simply must try these Stuffed Cookie Cups with Molten Center. First, they are incredibly easy. Forget complicated techniques; this recipe comes together in a flash.
You make a simple cookie dough, press it into muffin tins, add your favorite gooey filling, and bake! Second, they offer a truly show-stopping presentation. Imagine serving individual cookie cups, each with a hidden, warm, flowing center.
Your family and friends will rave about the delightful surprise inside every single one of these Stuffed Cookie Cups with Molten Center. Furthermore, this recipe is perfect for involving little hands in the kitchen. My kids love helping press the dough and choose their fillings, making it a wonderful family activity.
You also gain incredible versatility; customize the cookie base and the molten center to suit any craving or dietary need. Finally, the sheer comfort factor is off the charts. A warm, soft cookie exterior giving way to a rich, warm, gooey core?
Pure bliss! This isn’t just a dessert; it’s an experience, a little moment of pure happiness in every single bite of these amazing Stuffed Cookie Cups with Molten Center.
Ingredients You’ll Need
Gathering your ingredients is the first step to creating these incredible Stuffed Cookie Cups with Molten Center. You likely have most of these pantry staples already! Quality ingredients always make a difference, especially when crafting such a delightful treat.
| Ingredient | Quantity |
|---|---|
| Unsalted Butter, softened | 1 cup (2 sticks) |
| Granulated Sugar | ¾ cup |
| Light Brown Sugar, packed | ¾ cup |
| Large Eggs | 2 |
| Vanilla Extract | 2 teaspoons |
| All-Purpose Flour | 2 ¼ cups |
| Baking Soda | 1 teaspoon |
| Salt | ½ teaspoon |
| Chocolate Squares (e.g., Ghirardelli squares, large chocolate chips, mini candy bars) | 12-18 pieces (about 1 oz each) |
| Non-stick cooking spray or paper cupcake liners | As needed |
For the molten center, I often use quality chocolate squares. They melt beautifully, creating that perfect gooey core in your Stuffed Cookie Cups with Molten Center. However, feel free to get creative with your filling choices!
Substitutions & Variations
One of the beautiful things about these Stuffed Cookie Cups with Molten Center is their adaptability. You can easily switch things up to suit your taste, what you have on hand, or any dietary considerations.
* Cookie Dough Base:
* Store-Bought Convenience: Absolutely! Use a 16-18 oz roll of pre-made chocolate chip cookie dough or sugar cookie dough. Simply press it into the muffin cups as instructed.
This shortcut makes creating Stuffed Cookie Cups with Molten Center even faster.
* Different Flavors: Try peanut butter cookie dough for a rich, nutty base. You can also add cocoa powder to your homemade dough for double chocolate Stuffed Cookie Cups with Molten Center.
* Gluten-Free: Substitute the all-purpose flour with a 1:1 gluten-free baking flour blend. Ensure your baking soda is also gluten-free if needed.
* Dairy-Free: Use plant-based butter and dairy-free chocolate squares for the filling.
* Molten Center Fillings: This is where the real fun begins for your Stuffed Cookie Cups with Molten Center!
* Nutella: A spoonful of Nutella creates a wonderfully hazelnut-chocolate molten center.
* Caramel: Use soft caramel candies or a dollop of thick caramel sauce for a chewy, sweet surprise.
* Peanut Butter Cups: Mini peanut butter cups are fantastic! They melt into a dreamy, salty-sweet core.
* Other Candies: Small candy bars like Snickers, Milky Way, or Reese’s miniatures work beautifully.
Just make sure they fit inside the cookie cup.
* Fruit Preserves: For a less decadent option, try a teaspoon of your favorite fruit preserves like raspberry or cherry.
* Cream Cheese: Mix softened cream cheese with a little sugar and vanilla for a cheesecake-like molten center.
* Toppings & Garnishes:
* Sprinkles: Add colorful sprinkles before baking for a festive look.
* Powdered Sugar: A dusting of powdered sugar after baking always looks elegant.
* Chocolate Drizzle: Melt a little extra chocolate and drizzle it over the cooled Stuffed Cookie Cups with Molten Center.
* Sea Salt: A tiny sprinkle of flaky sea salt on top of chocolate fillings enhances the flavor beautifully.
Don’t be afraid to experiment! Each variation brings a new dimension to these delightful Stuffed Cookie Cups with Molten Center.
One of the beautiful things about these Stuffed Cookie Cups with Molten Center is their adaptability. You can easily switch things up to suit your taste, what you have on hand, or any dietary considerations—just like in our guide on How to Make Dubai Chocolate Bar: A Step-by-Step Guide (2025).
Step-by-Step Instructions
Crafting these amazing Stuffed Cookie Cups with Molten Center is incredibly straightforward. Follow these steps, and you’ll have a warm, gooey treat in no time!
1. Prepare Your Workspace: First, preheat your oven to 375°F (190°C). Then, lightly grease a 12-cup standard muffin tin with non-stick cooking spray or line it with paper cupcake liners. This prevents sticking and makes removal of your Stuffed Cookie Cups with Molten Center a breeze.
2. Cream Butter and Sugars: In a large mixing bowl, using an electric mixer, cream together the softened butter, granulated sugar, and brown sugar until the mixture is light and fluffy. This usually takes about 2-3 minutes.
3. Add Eggs and Vanilla: Next, beat in the eggs one at a time, ensuring each egg is fully incorporated before adding the next. Stir in the vanilla extract. Scrape down the sides of the bowl to combine everything thoroughly.
4. Combine Dry Ingredients: In a separate medium bowl, whisk together the all-purpose flour, baking soda, and salt. This step distributes the leavening evenly, ensuring tender Stuffed Cookie Cups with Molten Center.
5. Gradually Add Dry to Wet: Gradually add the dry ingredient mixture to the wet ingredients, mixing on low speed until just combined. Do not overmix; overmixing develops gluten and can lead to tough cookies. The dough will be soft and pliable.
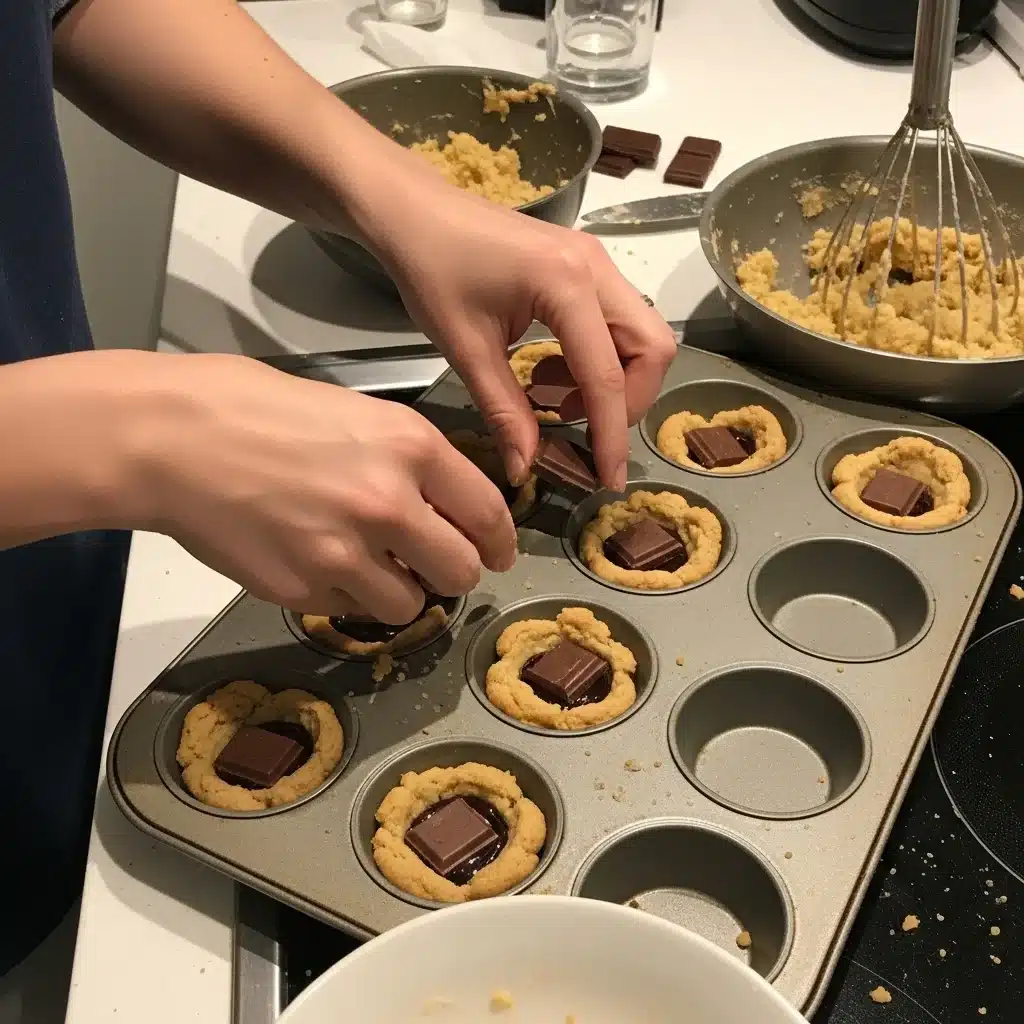
6. Form the Cookie Cup Base: Take about a tablespoon and a half of cookie dough. Press it evenly into the bottom and up the sides of each prepared muffin cup, creating a shell. Ensure the dough creates a good well for your molten center filling.
7. Add Your Molten Center: Place one chocolate square (or your chosen filling, such as a teaspoon of Nutella or a mini peanut butter cup) into the center of each cookie dough cup. Make sure it nestles down nicely. This is the heart of your Stuffed Cookie Cups with Molten Center!
8. Top with More Dough: Take another tablespoon of cookie dough and gently flatten it with your hands. Place this flattened piece of dough on top of the filling, carefully sealing the edges to fully enclose the molten center. You want to make sure the chocolate is completely covered.
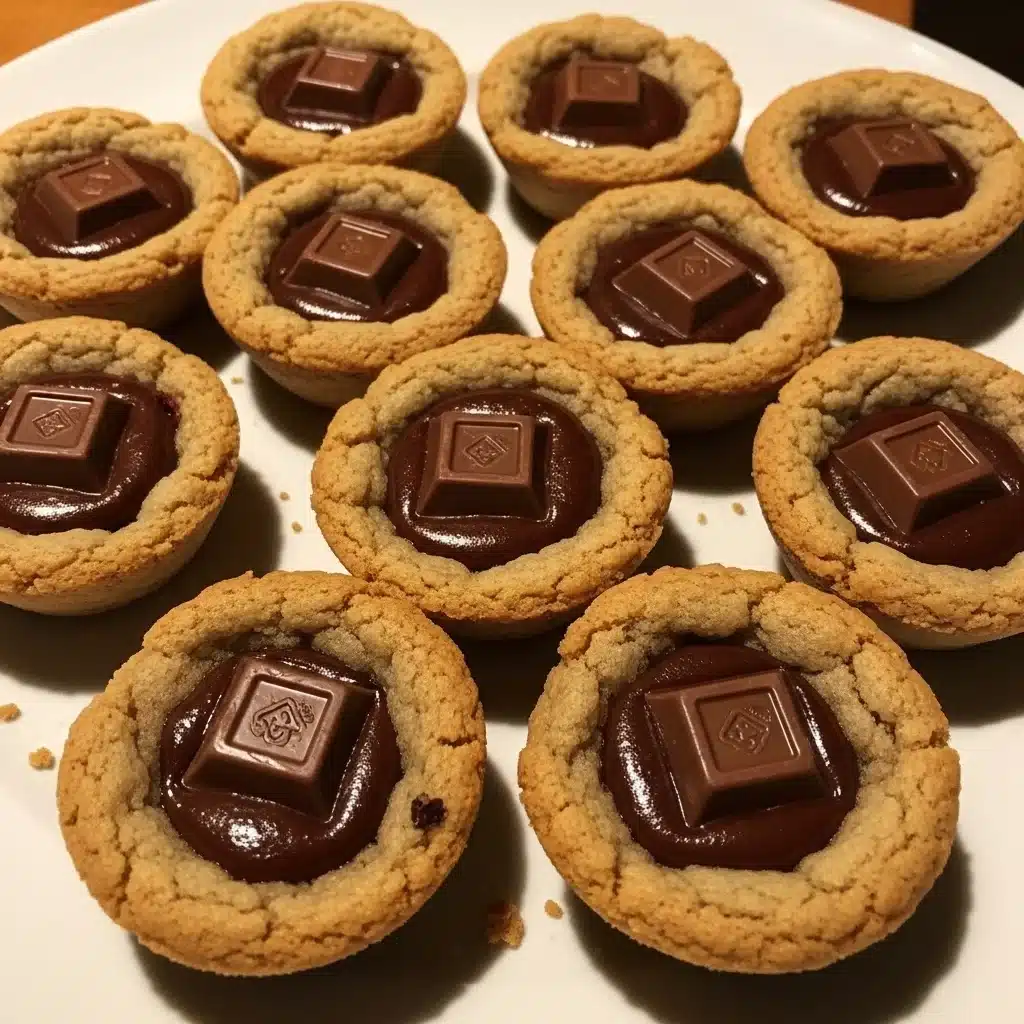
9. Bake to Perfection: Transfer the muffin tin to the preheated oven. Bake for 12-15 minutes, or until the edges are golden brown and the centers are set but still look soft. The magic of your Stuffed Cookie Cups with Molten Center is happening!
10. Cool and Enjoy: Remove the muffin tin from the oven. Allow the Stuffed Cookie Cups with Molten Center to cool in the pan for about 5-10 minutes before carefully transferring them to a wire rack to cool further.
They will be fragile when warm, but cooling slightly ensures that delicious molten center remains intact and safe to eat. Serve warm for the best molten experience.
Pro Tips for Success
Achieving perfect Stuffed Cookie Cups with Molten Center every time is easy with a few simple tricks. These tips will help you create a truly exceptional dessert that will impress everyone.
* Don’t Overfill: Resist the urge to add too much filling. A single chocolate square or a small candy piece works perfectly. Overfilling can cause the molten center to burst out during baking, making a mess and potentially drying out your Stuffed Cookie Cups with Molten Center.
* Chill the Dough (If Needed): If your cookie dough feels too sticky or soft to handle, cover it and refrigerate it for 30 minutes. Chilled dough is much easier to press into the muffin tin and will hold its shape better, leading to beautifully formed Stuffed Cookie Cups with Molten Center.
* Watch Baking Time Closely: Oven temperatures can vary.
Start checking your Stuffed Cookie Cups with Molten Center around the 12-minute mark. You want the edges to be golden, but the centers should still look slightly soft. This ensures the molten center stays gooey and the cookie itself remains tender.
* Use Quality Chocolate: The type of chocolate you use for the molten center truly matters. High-quality chocolate squares or baking chocolate bars melt more smoothly and provide a richer flavor than standard chocolate chips, which often contain stabilizers to prevent melting. This makes all the difference in a truly “molten” center for your Stuffed Cookie Cups with Molten Center.
* Grease Well or Use Liners: Always grease your muffin tin thoroughly or use paper liners. This is crucial for easy removal of your delicate Stuffed Cookie Cups with Molten Center once baked. Nothing is more disappointing than a delicious cookie stuck in the pan!
* Allow to Cool Slightly: While tempting to dive in immediately, let the Stuffed Cookie Cups with Molten Center cool in the pan for a few minutes. This allows them to set up slightly, making them easier to remove and preventing burns from the hot molten center. They will still be warm and gooey, promise!
* Even Dough Distribution: Try to make the dough shells roughly the same thickness. This ensures even baking and consistent texture across all your Stuffed Cookie Cups with Molten Center.
Achieving perfect Stuffed Cookie Cups with Molten Center every time is easy with a few simple tricks. Make sure to follow our handy tips to create a truly exceptional dessert in our article on Strawberry Cake and Cheesecake.
Storage & Reheating Tips
You made these delightful Stuffed Cookie Cups with Molten Center, and now you want to savor them! Proper storage and reheating will keep them tasting fresh and ensure that glorious molten center returns.
* Storage: Once completely cooled, store your Stuffed Cookie Cups with Molten Center in an airtight container at room temperature for up to 3 days. For longer storage, you can keep them in the refrigerator for up to a week.
* Freezing Baked Stuffed Cookie Cups with Molten Center: These freeze wonderfully!
Arrange cooled cookie cups in a single layer on a baking sheet and freeze until solid (about 1-2 hours). Once frozen, transfer them to a freezer-safe bag or container. They will keep well for up to 2-3 months.
Thaw at room temperature overnight or reheat directly from frozen.
* Reheating for that Molten Center:
* Microwave: For the quickest molten center, place an individual Stuffed Cookie Cups with Molten Center on a microwave-safe plate. Heat on high for 10-20 seconds.
Watch carefully! You want the center gooey, not exploding.
* Oven: To reheat several Stuffed Cookie Cups with Molten Center at once, place them on a baking sheet.
Warm them in a preheated oven at 300°F (150°C) for 5-10 minutes, or until the filling is warm and gooey again. This method often yields the best results, creating a lovely crispy exterior and a perfect molten center.
* Air Fryer: Place cooled (or frozen) Stuffed Cookie Cups with Molten Center in the air fryer basket. Cook at 300°F (150°C) for 3-5 minutes (if cooled) or 7-10 minutes (if frozen), checking for that lovely molten interior.
Always reheat gently to maintain the delicious texture of the cookie and the perfect gooeyness of the molten center in your Stuffed Cookie Cups with Molten Center.
What to Serve With This Recipe
These Stuffed Cookie Cups with Molten Center are a star on their own, but pairing them with the right accompaniments can elevate the experience even further. Think about complements that enhance their warmth and richness.
* A Tall Glass of Cold Milk: This is a classic pairing for any cookie, and it’s absolutely perfect with these gooey Stuffed Cookie Cups with Molten Center. The coolness of the milk beautifully contrasts the warm, molten chocolate.
* Coffee or Tea: For the adults, a freshly brewed cup of coffee or a comforting mug of tea provides an excellent companion.
The slight bitterness of coffee or the subtle notes of tea can cut through the sweetness of the cookie cups.
* Vanilla Bean Ice Cream: Serve a warm Stuffed Cookie Cups with Molten Center alongside a scoop of premium vanilla bean ice cream. The hot and cold contrast, along with the rich flavors, creates an indulgent dessert.
* Fresh Berries or Fruit Salad: To add a touch of freshness and balance the richness, serve your Stuffed Cookie Cups with Molten Center with a side of mixed berries (strawberries, raspberries, blueberries) or a light fruit salad. The natural tartness of the fruit is a delightful palate cleanser.
* Whipped Cream: A dollop of freshly made whipped cream on top of a warm cookie cup is always a welcome addition.
You can also flavor the whipped cream with a touch of vanilla or a dash of cinnamon.
* Dessert Platter: These Stuffed Cookie Cups with Molten Center are fantastic as part of a larger dessert spread for parties or potlucks. They look elegant and portioned, making them easy for guests to enjoy.
* A Cozy Night In: Honestly, sometimes the best accompaniment is simply a warm blanket, a good movie, and the company of loved ones. These Stuffed Cookie Cups with Molten Center are the ultimate comfort food for a relaxed evening.
No matter how you choose to serve them, these Stuffed Cookie Cups with Molten Center promise to be a hit!
These Stuffed Cookie Cups with Molten Center are a star on their own, but pairing them with the right accompaniments can elevate the experience even further. To learn about a delicious spread that perfectly complements these treats, check out Pistachio Nut Butter: Healthy Spread Worth Every Spoonful.
FAQs
Can I use store-bought cookie dough for Stuffed Cookie Cups with Molten Center?
Absolutely! Using a roll of store-bought chocolate chip or sugar cookie dough makes this recipe even quicker. Simply press the dough into the muffin tin, add your molten center filling, and bake as directed. It’s a fantastic shortcut for busy days when you crave these delightful Stuffed Cookie Cups with Molten Center.
What makes the center truly “molten”?
The key to a truly molten center in your Stuffed Cookie Cups with Molten Center is using a good quality chocolate that melts smoothly, like chocolate squares or chunks from a baking bar. Also, careful baking time is essential. You want the cookie to bake through, but the center should remain soft and gooey. Don’t overbake!
Can I make these Stuffed Cookie Cups with Molten Center ahead of time?
Yes, you can! You can prepare the cookie dough a day or two in advance and store it in the refrigerator. Alternatively, you can bake the Stuffed Cookie Cups with Molten Center completely, let them cool, and store them at room temperature or in the fridge. Reheat them gently before serving to restore that wonderful molten center.
How do I prevent the Stuffed Cookie Cups with Molten Center from sticking to the pan?
Always grease your muffin tin thoroughly with non-stick cooking spray, even if it’s a non-stick pan. Using paper cupcake liners is another excellent way to ensure easy removal of your Stuffed Cookie Cups with Molten Center. This simple step saves so much frustration!
Are these Stuffed Cookie Cups with Molten Center good for parties?
They are absolutely perfect for parties! Their individual serving size makes them easy to grab and enjoy. Plus, the surprise molten center is always a crowd-pleaser.
You can even prepare them in advance and reheat them just before guests arrive for a warm, impressive dessert. They’re a hit every time!
Stuffed Cookie Cups with Molten Center are a delightful dessert that combines the rich flavors of cookies with a warm, gooey chocolate center. These treats are perfect for any occasion and are easily customizable to suit different tastes, making them a favorite among families and dessert lovers alike. You can learn more about similar dessert concepts in this Cookie article.
Nutrition Information (per serving)
Here is an estimated nutritional breakdown for one of these delightful Stuffed Cookie Cups with Molten Center. Please note that these values are approximate and can vary based on specific ingredients and brands used, especially your choice of molten center filling. This information helps you enjoy your treats mindfully.
| Nutrient | Amount |
|---|---|
| Calories | 320 kcal |
| Total Fat | 16g |
| Saturated Fat | 9g |
| Cholesterol | 50mg |
| Sodium | 160mg |
| Total Carbohydrates | 40g |
| Dietary Fiber | 1g |
| Total Sugars | 28g |
| Protein | 4g |

Stuffed Cookie Cups with Molten Center
Stuffed Cookie Cups with Molten Center are delightful treats that combine a soft cookie exterior with a warm, gooey chocolate center, making them perfect for satisfying sweet cravings.
- Total Time: 35 mins
- Yield: 12 servings 1x
Ingredients
1 cup Unsalted Butter, softened
¾ cup Granulated Sugar
¾ cup Light Brown Sugar, packed
2 Large Eggs
2 teaspoons Vanilla Extract
2 ¼ cups All-Purpose Flour
1 teaspoon Baking Soda
½ teaspoon Salt
12–18 pieces Chocolate Squares (e.g., Ghirardelli squares, large chocolate chips, mini candy bars)
Non-stick cooking spray or paper cupcake liners, as needed
Instructions
- Preheat your oven to 375°F (190°C) and grease a 12-cup muffin ti
- In a mixing bowl, cream together the softened butter, granulated sugar, and brown sugar until fluffy
- Add eggs one at a time, mixing well, and then stir in the vanilla extract
- In another bowl, whisk together flour, baking soda, and salt, then gradually mix it into the wet ingredients
- Press equal amounts of dough into the muffin cups to form shells
- Add a chocolate square into the center of each cookie cup, and cover with more dough
- Bake for 12-15 minutes until the edges are golden brow
- Cool before serving warm
Notes
Feel free to experiment with different fillings for the molten center.
- Prep Time: 20 mins
- Cook Time: 15 mins
- Category: Dessert
- Method: Baking
- Cuisine: American
- Diet: Vegetarian
Nutrition
- Serving Size: 1 cookie cup
- Calories: 320 kcal
- Sugar: 28g
- Sodium: 160mg
- Fat: 16g
- Saturated Fat: 9g
- Unsaturated Fat: 7g
- Trans Fat: 0g
- Carbohydrates: 40g
- Fiber: 1g
- Protein: 4g
- Cholesterol: 50mg